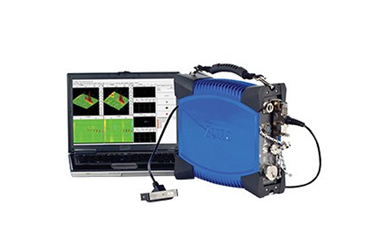
EDDY CURRENT INSPECTION IN SAUDI ARABIA
EIWAA Marine Services offers Non-Destructive Testing of structural welding joints even if it is painted or in coating condition and it is known as eddy current testing services. This NDT Testing and NDT Inspection Services of Eddy Current Testing normally used in marine structural welding joints. EIWAA Marine Services is approved by major ports of Saudi Arabia and marine classification approved NDT Testing body to perform Eddy current inspection services of painted structures. Surface breaking/cracks and near surface planar defects in welds, heat affected zones, and parent material are inspected through eddy current testing, and eddy current inspection services. EIWAA Marine Services enables eddy current testing for coated and uncoated objects, and the testing can be executed on any surface that is accessible on welds with most any shape.

Eddy current inspection could detect surface cracks through non-metallic surfaces as thick as 2mm, depending on the sensitivity requirements. Equipment in use for eddy current inspection and testing should be able to work in the 1 KHz to 1 MHz frequency range. A calibration block composed of the same material must be used for calibration of the Eddy current testing equipment. Unless otherwise agreed upon by contracting parties, Eddy Current inspection instrument calibration blocks have EDM Notches of 0.5 mm, 1 mm, and 2 mm depth. To replicate the coating or actual thickness on the calibration block, non-metallic strips with a defined thickness must be used. The frequency of weld inspection in ferritic materials should be defined by the material’s conductivity and permeability, the defect’s type, location, and size, and the probe’s design. It is advised to utilize a frequency of nearly 100 KHz. In a ferritic steel weld in the as-welded condition, the eddy current approach can detect indications as small as 1mm deep by 5 mm in length.
It is requested that the testing be supplemented with some other NDT inspection technique like magnetic particle testing or penetrant testing when there is a need for more clarification. The depth and direction of an indication should be verified using an alternate NDT Inspection method, such as ultrasonic or alternating current field measurement inspection services.
Whether the component is painted or coated, Eddy Current Inspection services is used to measure surface cracks in welding or the parent material. Eddy current inspection is typically used to fulfill inservice inspection or condition monitoring requirements. For rigs, platforms, and jackets. Major oil and gas companies like PDO, QATAR Gas, ADNOC, and ARAMCO have approved the Eddy Current Inspection Services and our Instrument by API, AWS, and ASME.
BENEFITS OF EDDY CURRENT INSPECTION
EIWAA Marine Services is the leading NDT Inspection company in Saudi Arabia & Bahrain, use both conventional and advanced NDT inspection methods. For non-magnetic conductive materials, our Eddy Current Inspection equipment and specific probes are often employed to achieve higher test sensitivity.
The following are some benefits of eddy current inspection:
- Ferritic or nonferritic conductive materials could be used as base materials or welds in eddy current inspection.
- The size of defects, which includes both depth and length information, is evaluated via Eddy Current Inspection.
- Only minimal surface preparation is required for eddy current inspection, and it can be used over paint or other coatings.
Uses for Eddy Current Inspection:
- The detection and sizing of fatigue cracks and hydrogen cracking are performed using eddy current inspection services.
- Fillet weld joints of offshore and onshore units are examined using eddy current inspection technology.
Eddy current inspection is used in the aerospace sector to inspect gears, gear teeth, crankshafts, cylinder heads and turbines etc.
